If you have read my blog post about my first sling, slinging for me started with friends. I would not be where I am today if it was not for friends to throw with. Or friends to watch me throw. I certainly would not have continued this long without friends to cheer and gasp with amazement.
I love showing new friends a sling. It is so unassuming. As they hold it, they pull it back like a rubber slingshot and say, “this won’t shoot anything.” At that point, I get an egg-sized stone and maybe a few flat rocks. After that first throw with the rock going 200 to 300ft, they all get excited. Then I throw some flat stones, and they hear the sound that rocks can make. Soon I have 20 to 30-year-olds running around getting stones for me to throw. There is nothing like it.
Getting friends into slinging is also a great way to improve your slinging.
My friend, Matt from college, helped me get better at slinging. He was the first friend that got into slinging as much as I did. He was a blacksmith (I was a painter), and he did pole vaulting in high school (I played video games and did break dancing), so he was much stronger than I was in the upper body department. So when we started throwing, I could outthrow him. But he caught up fast; I had taught him all the tricks for distance before long, and he was throwing further than me!
This got me to practice more. I was learning new ways to throw. Improving my form for the throws, I could already do. And I was working on the release angle for the optimal distance. Once that was set, I started finding the right stones. The ones that would fly further and straighter. And after a while, it was a toss-up on which one of us would throw further. If one of us had a better stone or favorable wind when we threw, that person would win.
Throwing with Matt was the first time I threw over 300 feet. And if it weren’t for him, I would still be happy throwing 150 to 200 feet.
Friends can push you to get better. Whether it is an accuracy contest or a distance contest, some healthy competition is always helpful when it comes to improving. Also, you always have someone to check your form when you throw. You may drop your shoulder right before you throw. Your rotation may be slightly off. You will be able to see this if you record yourself. But it is easier with a friend to see you in person. There is a lot that a video can miss. Even simply having someone there to talk things out makes overcoming challenges easier.
Write in the comments if you have any friends that you sling with. Or if you have any friends that might be interested in it.
These throws capture the main techniques of throwing with a sling. If you master each throw, you can easily pick up any new or advanced throwing style.
The foundational skill of each throw.
The Shepard throw is a stationary throw that focuses on core rotation and planting your feet solidly on the ground before the throw.
The Overhand throw focuses on the vertical overhead release.
The Underhand throw introduces the vertical low-angle release.
The Balearic throw is a compound throw that builds up force with a windup and introduces a change in the plane from windup to throw.
How to perform each throw
The Shepard Throw
I always start people with this throw because it builds the foundation of core rotation and sets a solid base.
How to do the throw: Hold the stone and the pouch in your non-throwing hand with the finger loop and trigger string held in your throwing hand. Bring the sling in front of you and a little over your head. The sling should be parallel to the ground and taught between your hands. First, slightly rotate your upper body to the open side, turning your back towards the target. To start the throw, un-rotate your torso, let go of the pouch and continue the swing with your throwing arm. Release the trigger string when your hand is in the same position that you would release a baseball.
You want your feet wider than shoulder distance apart and roughly in line with each other. At the start of the throw, you want both feet flat on the ground. As you un-rotate, you want to transition your weight from your back foot to your front foot. You end by lifting the heel of your back foot while you push forward onto your toe. Throwing is about weight transfer. You are loading on the back foot and releasing that ahead. The better the transition of weight, the harder and farther you will be able to throw.
The Overhand Throw
This throw is an integral part of learning a lot of advanced throws.
This throw requires a sling that does not hit the ground when your arm rests at your side. Again, a 5-inch clearance is best. Your throw will make a giant circle with your arm and sling.
How to do the throw:: Like with the Shepard throw, you start with the rock and pouch in your non-throwing hand. Your throwing hand is in front of you. Roughly between the upper stomach and lower chest height. The trick to this throw is to keep your palm facing up for the whole throw.
When you are ready to throw, you drop the pouch with the rock and move your throwing arm down and back. Next, you want to get your arm to an outstretched position as soon as possible. Then you will have your arm go back and up to have the release be about a 45-degree angle from the ground.
You want your feet about shoulder distance apart and your toes facing the target. You load your weight back at the start of the throw. Then thrust forward as you move to release.
The Underhand Throw
Like with the overhand throw, you will want a sling that will not hit the ground while your arm is hanging by your side.
How to do the throw: To start the throw, you will begin with your arm above your head bent at the elbow, holding the pouch and rock with your non-throwing hand. To start the throw, you dip your front hand down and bend your body at the hip, as you would set up a tennis serve. Then straighten up and extend your arm back and around. The tip for this is to keep your hand palm side down until the end when it should face forward towards your target—releasing like a softball pitch or even a bowling throw. You want the trajectory of the throw to be on a flat plane and travel on level ground to the target. This throw is meant for low shots over water or also high non-aimed volleys.
For foot placement, you will once again have your feet roughly shoulder distance apart and pointing at your target. When you rock down, load the back leg, and as you swing around, add the power transferring your weight to your front leg as you throw.
The Balearic Throw
The first true compound throw on the list. This throw is last because you should practice it after getting a solid grasp of the other throws. The Balearic is the first throw that has a windup.
How to do the throw: The stance is with your body perpendicular to the target with your throwing hand next to your body, elbow bent to give space for the sling to spin. The windup is two rotations. The throw is one and a half. You want to start the windup by spinning the sling to the front side of your body. And have it swing up and over to the back. It will be rotating on a flat plane perpendicular to your body. As the third rotation starts, you will bring your arm up to have the third rotation above your head, ending at the start of the fourth rotation when you let go of the stone.
Your feet will be just wider than shoulder distance apart. With the toes of your front foot roughly 45 degrees to your target. With your back foot parallel to the target. This stance gives you a strong plant foot, which will increase the power of your throw, along with enough initial rotation in your foot to fully rotate your chest forward to face the target before you release.
After Foundations
After learning all these throws, you can hone your technique to utilize your power and throw accurately and powerfully.
If you find yourself weak in an area, you can always return to one of these throws to help improve your skills again. Below is the skill most related to each throwing style.
Accuracy: Shepard Throw
Release timing: Underhand Throw
Getting proper extension: Overhand Throw
Timing: Balearic Throw
As you progress on your slinging journey, ensure you own a good sling.
I really got into skipping stones again this summer. No, not with a sling (but I will get to that later), just with my arm. I started the summer with one big skip and then a few more hops before the stone sank into the water. After that, I focused really hard on throwing it as hard as possible and getting enough power behind it to get A LOT of skips! But every time, it would just skip higher and further, and I would still only get a few skips out of the whole thing. So then, I started thinking about the angle.
How sharp am I coming down at the water?
Where does the stone start in my hand vs. where does the stone end coming out of my hand?
Should they hit the water closer to shore or further away?
Do I throw them harder, or do I throw them flatter?
That’s when it all clicked. I started getting lower in my throwing stance. I would throw to hit the water 40ft in front of me instead of 20. I would give myself a few practice throws, really making sure I had the right throwing angle before I even let the rock leave my hand.
This relates to slinging as well.
One thing I love doing with a sling is throwing for distance. I really don’t care most of the time where the rock goes as long as it is forward and really far.
This is when angle comes into play. If I throw too high (vertical plane), I lose horizontal distance because it is taken up by vertical distance. If I throw it off from my most powerful arm angle (horizontal plane), then I lose out on distance because I couldn’t get all my power behind the throw. If I’m off by just a hair, it is 20 to 40 feet less distance.
So why is this important to you too? If you don’t start thinking about your release angle, you will always have trouble getting what you are aiming at, and you will have difficulty getting the max distance every time. Or being accurate with your sling. Also, you won’t be able to skip stones with your sling!
So first, let’s think about slinging for accuracy. There are a few things that come up when we first start with that. First, do we have the correct height of the rock? Second, how far left or right do we need to aim? And Third, how far away is our target. All these things happen in the last section of our throw, in under one second. So how are we supposed to really focus on this?
Think about it like the freeze-frame of a pitcher. Right before the ball is about to leave their hand, what do they look like?. One leg stretched way back, The other way forward, the throwing elbow bent like it might break at any moment. Yeah, that one. If everything is in line, the ball goes where they want.
We have the same thing, just our arm also has a sting at the end of it. And that release point is what we can spend some time focusing on.
Whenever you are trying something new with the sling, always start off slow and with minimal power. You just need to make the sling move. If you are going for a distance, you want the sling to release at a 45-degree angle to the ground. That gets a nice arch on the stone, and I have found that the best result. However, if you are going for accuracy, you want it to be as close to perpendicular or zero degrees of angle to the target as possible. But in reality, it’s more like a 20-degree cause most things will be on the ground. But if it is something on a tree or a target 50 feet away, you pretty much have the rock travel parallel to the ground and hit the mark.
Now for what throw works best for what. For distance, the best throw I have found is the figure 8 throw. This throw is so valuable because it cuts out a lot of the horizontal plane, and you can focus on the vertical release point. If you mess up, you are throwing too high or right into the ground. You don’t have to worry about not getting your arm behind the sling and not getting the distance.
For accuracy, the best throw is the shepherd’s throw. I like the shepherd’s throw because it allows you to lower your arm and give a sidearm throw when trying to hit a target on the ground or in the water. You can skip a stone across the water to shoot a duck, for example. With the lateral movement of the shepherd’s throw, you have to worry less about up and down and focus more on the left and right,
The Balearic throw is somewhat of a controversial throwing style for me. It has a 2 beat windup and an overhand throw. It was historically used by the best singers in the world, but it is also a hard throw to get right. And has a lot of areas that can be messed up. SO I don’t really recommend it for someone just learning to sling. But it does give the biggest window of throws you can do. Because once you get comfortable with it, you can go high with a distance shot or low with a skip shot. All of it really works.
Hopefully, this helps you improve just a little bit in your slinging journey. And you either throw further or get that hitbox smaller on your throws.
For me, living in the New England portion of the United States, as this month rolls to an end I can only start to think about warmer weather and slinging more regularly. I can sneak a day in here and there, but the biting cold really does a number on my hands and throwing isn’t as comfortable as it usually is.
As these warmer months get closer, I want to share with you some insight on a question I get asked often.
It comes in other forms too. What should I throw: as a beginner? to get better accuracy? to get better distance? that is safe to use with the kids?
Lucky for you there are a ton of options. I’ll go over them from safest and fun to most deadly and accurate. Let’s begin.
First off is the safe fun backyard practice. Or maybe you took the kids or a youth group out for some camping and want to show them how cool slings are. The safest and most fun thing to throw are jumbo marshmallows. If they fall out mid swing no one is going to get hurt and you can eat some while people are learning. It is a win, win. But if you don’t like wasting food there are other options.
Other safe options are: Tennis Balls, Bean Bags, Hacky Sacks, Water balloons filled with flour. All these offer different benefits. Tennis balls can be thrown against a wall and come back. You can even draw different sized targets on the wall to practice accuracy. Bean bags and hacky sacks will conform nicely to the pouch and throw easily. Though if you get really good and miss the target you might lose your ammo. Lastly Balloons filled with flour. They give a great effect when you hit the target and they break!
Next is more traditional ammo, ROCKS. These are more dangerous if misused.
They’re also dirt cheap (sorry) and easy to find out on a walk or the trails.
Starting with the least consistent option we have -, driveway gravel. They work and they tend to be on the small and flat side which makes them noisy and sometimes curve in the air. But if you aren’t throwing for accuracy that is a really cool and exciting effect.
If you are out hiking you can find a bunch of stones on the trail. With a keen eye you can spot the good sling stone at a normal walking pace. Grabbing the good one as you get to your spot. But you can also grab whatever stones are available too – that also works. These tend to be better than gravel stones because of the options you will have. They tend to be bigger and denser and that is what you are looking for.
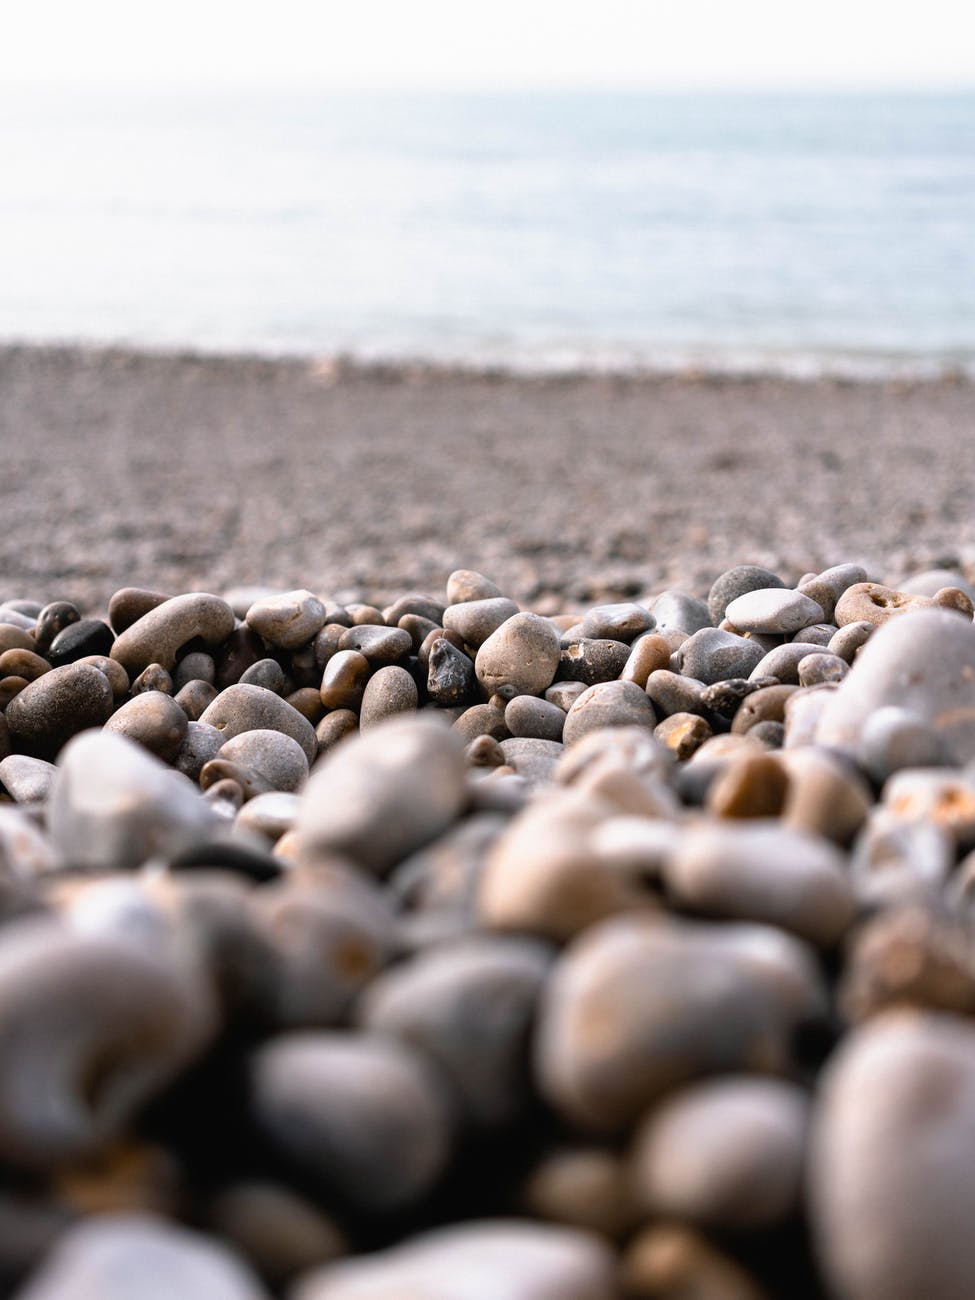
My favorite (so far) is beach and river stones. They are smooth and round, meaning they don’t rough up your sling and they are more consistent in the air. If you don’t have a river or beach nearby it is worth driving to one and grabbing a bucket or backpack of rocks to practice with. Especially if accuracy is your goal. The smoothness helps keep the rocks on track. If you want to hunt you also want a smooth stone so that it doesn’t make noise during the flight.
Something in between river stones and the next option is buying a bag of irrigation stones from a hardware store. They tend to be similar in size and they are cheap: $7 for 40 lbs. You can get a bunch of practice in with that bag. I also just learned about this, this year. I will be testing it out once it gets warmer.
Lastly, clay or concrete ammo you make yourself. This is something I will be working on learning this spring and summer. I think it will become my favorite ammo. But I can’t say so for sure until I try. This is the traditional ammo for the ancient Greek and Roman military. They even advanced to making lead, like gigantic bullets. However, that requires a lot more set up so I’m not going to suggest that for everyone. The clay or concrete ammo can be easily made and shaped to a football. This should give more distance and accuracy. It is also cheap to make and something that can be done in the winter months in the shed to be used once the warmer months come around.
I learned how to sling with driveway gravel. Over the years I have tried out a bunch of different stones and here are some qualities you want to look for when selecting a stone:
Round. If the stone is round it will go straight. If the stone is flat it has a tendency to curve.
Egg Sized. This works best for me and the slings I make. Much bigger and the weight can become an issue. It becomes hard to hold the sling and get it up to speed. Much smaller and the rocks don’t go anywhere.
Dense. Having all the mass tight together give a smoother and farther throw. If two rocks are the same size the denser one will go further. It just transfers the energy better.
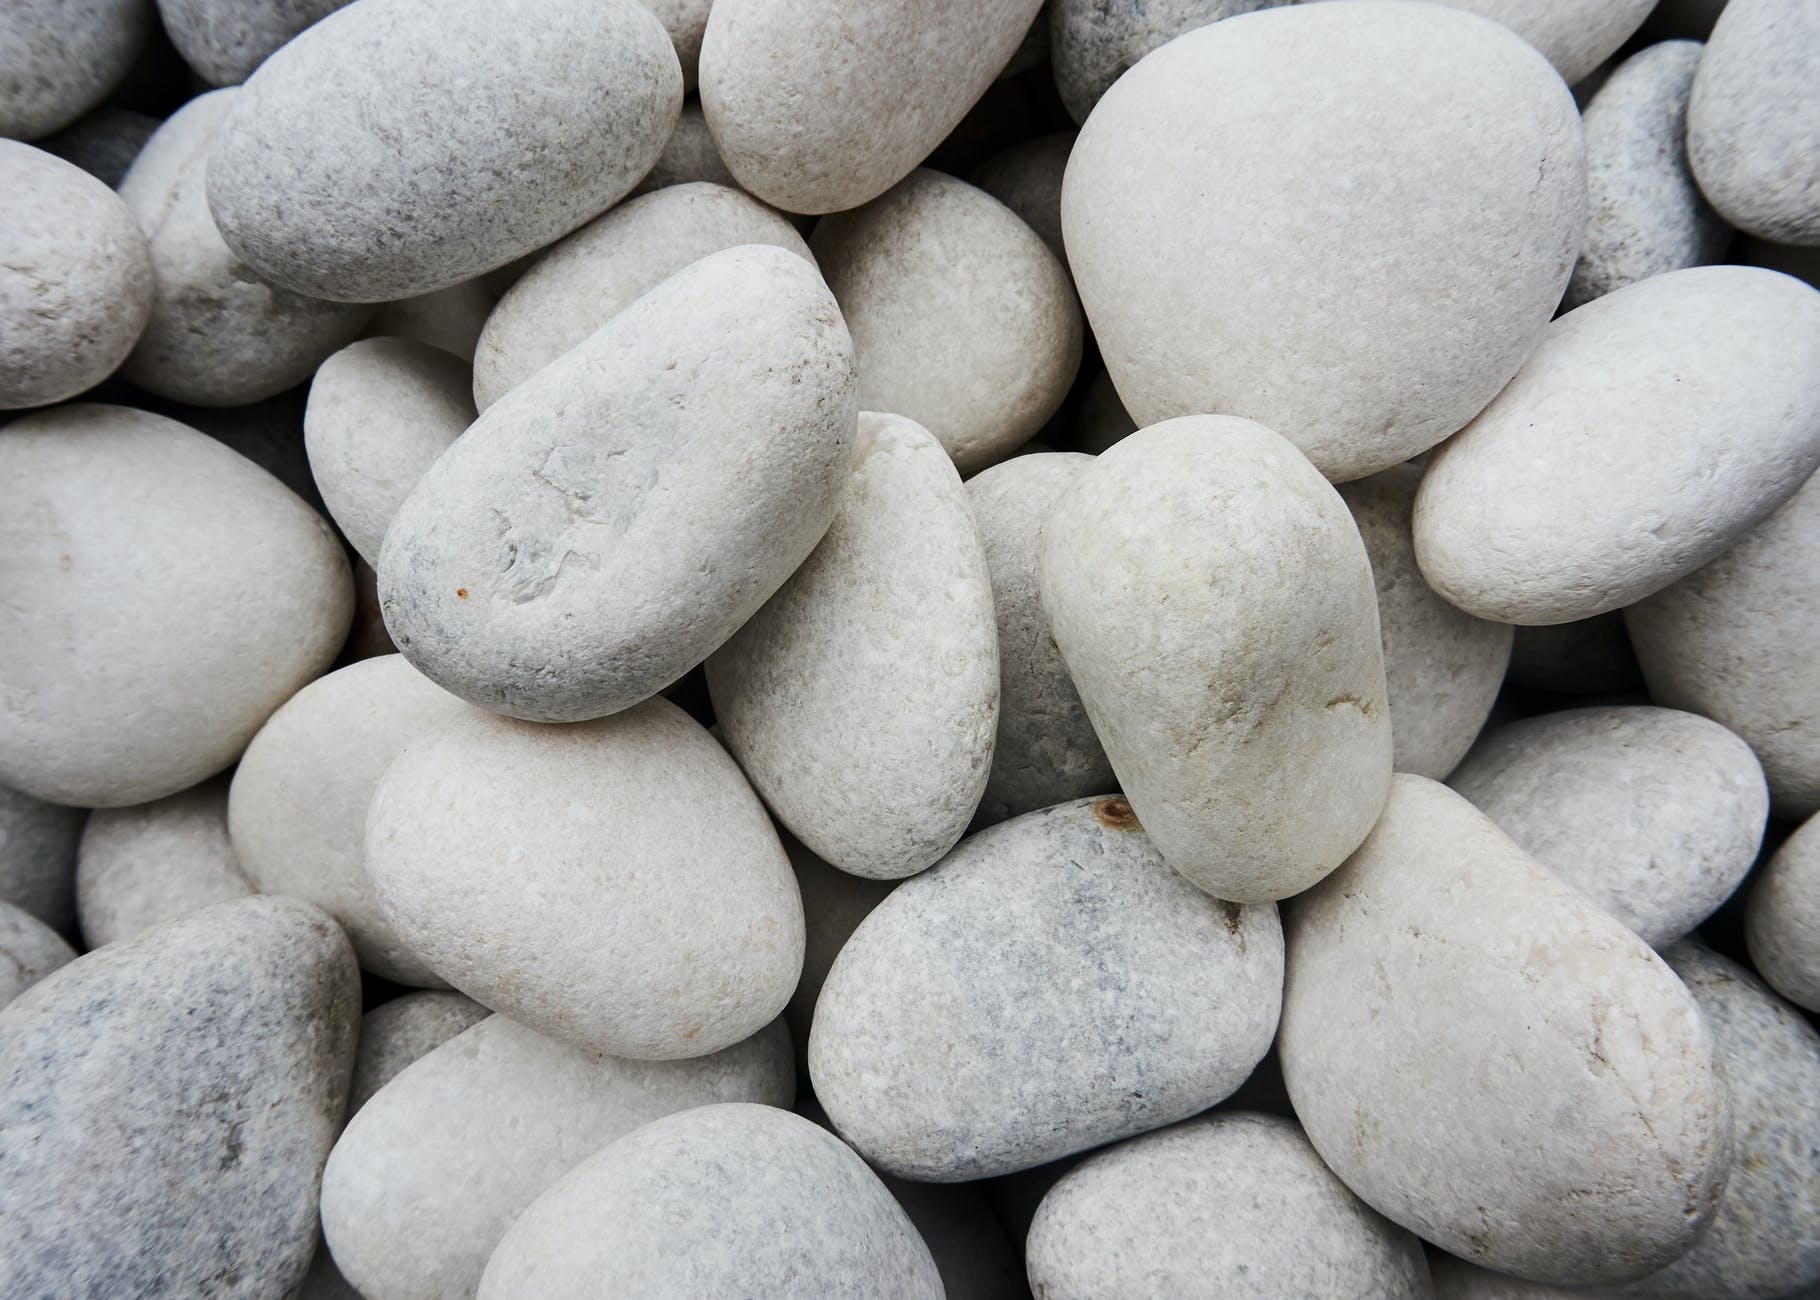
I love when I find egg sized quartz stones! They are naturally round and very dense. I have thrown these the furthest out of all the stones I have gotten to throw yet. So, keep an eye out for them.
Let me know what you think and what you have tried.
Back in the fall of 2001, at my best friend’s house, we were hanging out and then we ran out of stuff to do. We got bored. Being all of 13 we decided that this would be the best time to make something I had just seen on TV. A SLING.
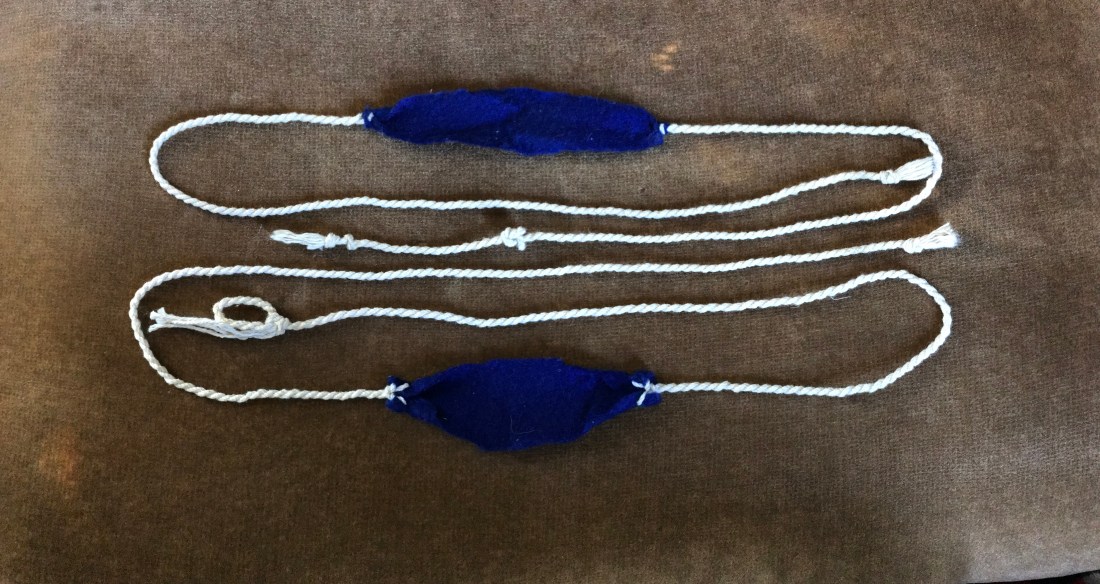
I kind of knew what it looked like. Kind of knew how it worked. This being the time before the internet was actually fast and useful and dial up took a while to get you anywhere, figured we could wing it. I knew we needed a pouch and some strings…. And… uhm… a rock to throw… So, we set off to the basement to start working on it with what we could find lying around. After some rummaging around we found some nice blue felt and then some cotton string. I had just come off summer camp where I had learned how to make rope from plant fibers. So, I figured this thin string would work well enough with a little bit of work.
To make the sling, we cut out the rough shape of the pouch with some scissors. We used a large nail in a vice to put some holes in the felt. Figuring it would rip if we cut it with scissors. After repeatedly cutting large holes with scissors… We then grabbed the cotton string. Tried to put it through the holes. For way too long. After a while of struggling we learned if we wrap tape around the end of the string it gets through the holes easier. So now I went about making the string thicker by reverse wrapping the cords together. This making them function like one big rope. Perfect, to the outside!
My friend was lucky enough to have a gravel driveway, so we had plenty of rocks to learn with. After some trial and error, we figured out ways to keep the strings around our finger without it flying off with the rock. As you can see one of the slings has a loop and the other one doesn’t. This was only an afterthought from an hour or so of throwing. I had found a technique for wrapping the cord around my finger in such a way that with slight pressure I could hold it there while still being able to release the cord with the pointer finger and thumb release. I used that technique for years before I adopted the finger loop. My friend was not as patient… stubborn as I was.
While we were learning we through rocks behind us. We threw rocks at the ground, at the sky, accidently at each other, his moms house…. That is what made us have to stop practicing at his place in the end. Luckily nothing was broken because the rocks from the driveway were really small, about marble sized.
I remember the exact moment that I got hooked on the sling. I was learning a new style for throwing. I had found online after hours of research. It was an under-hand throw. It was supposed to be a volley shot. I thought it might give me more power and distance. I windup, probably too many times, and then release the cord. And then… I wait, and wait, and figure it slipped out early and landed on the grass. As I bend down to pick up another rock, SMASH! Crack! Rustling of leaves. The rock landed about 150 ft behind me in the woods. It was crazy! I had no idea a rock could be in the air for that long. From then on, I was chasing that feeling and trying to get a crazy loft time and distance.
By no means were these slings good. Or the most efficient but they were everything I could have ever asked for in the beginning. I have made hundreds of different sling designs over the years. Easily a few thousand different slings since these first two. I however still like having them around. They show me how simple it is to start and how complex it can be to finish.
This is the start of a sling series where I talk about all the slings I have made. All the different designs I have kept up until now. I’ll show you what led me to the best design I have found so far, the “Elite Sling”. I sell it on my Etsy shop if you want to get started.